Slicer
Slicer can be downloaded from the official site. The following was done using the stable release, that uses Python 2.7.X
Labkey extension
Labkey extension is available on gitlab. For using git, see tutorial at medfiz Owncloud site. I assume you downloaded labkeySlicerPythonAPI somewhere on your computer using git.
Integrate Labkey with Slicer
First, a dummy setup for accessing remote content must be made. To do that, copy linked file to
the .labkey directory under your $HOME on your local PC. If you are in linux, $HOME is normally /home/username where username
is the name you used to login to your PC. You can reach $HOME by issuing cd without arguments. On Windows, $HOME refers to
C:\Users\username. If there is no directory called .labkey in your home area, which is true in most cases, go ahead and create
one. Change the name of file you just copied to Remote.json. To summarize: there should be a file /home/username/.labkey/Remote.json,
or C:\Users\username\.labkey\Remote.json with the content identical to the linked file.
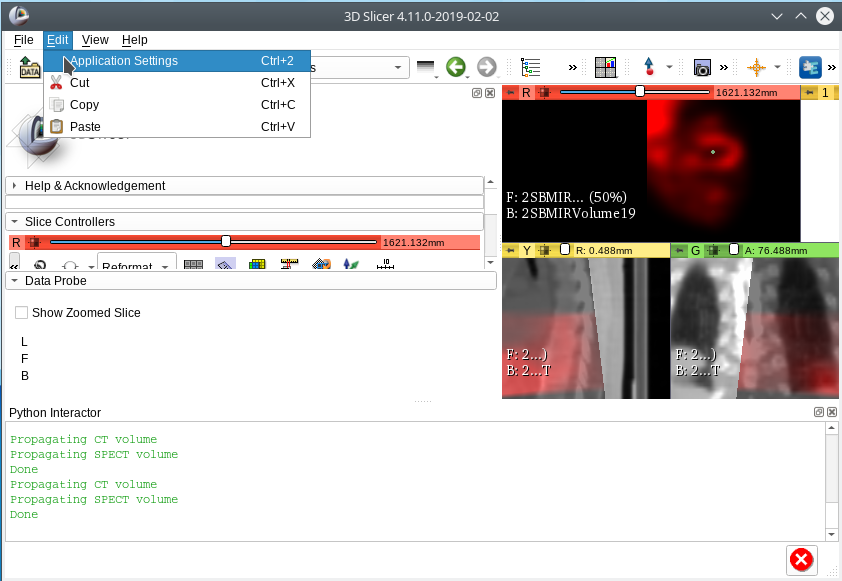
Then start Slicer. In the menu under Edit select application settings.
Select Modules from the left list and click on Add button
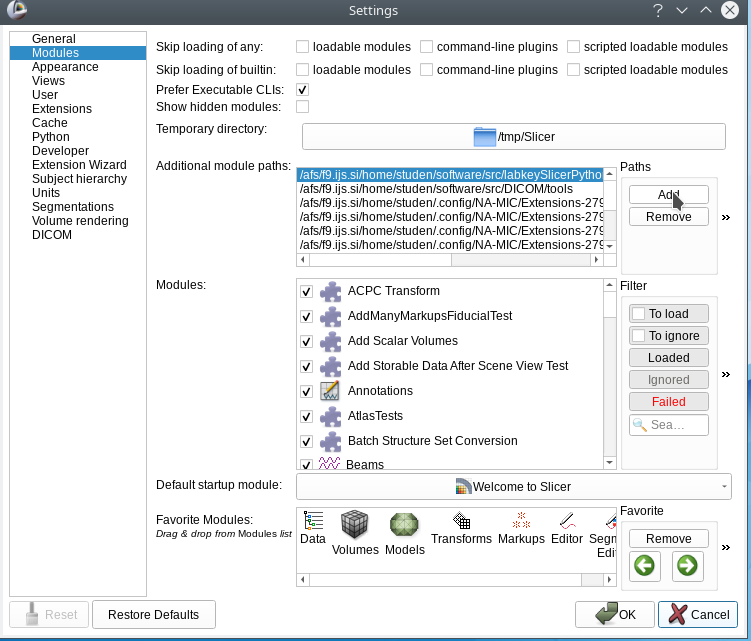
Select path to downloaded SlicerLabkeyExtenstion and directory labkeyBrowser and DICOMtools.
Before pressing OK, select Developer in the menu on the left. Tick Enable developer mode. This will put management buttons
in the top row of added modules (Reload, Reload and Test, Edit, Restart Slicer).
Press OK when done. In the pop-up window you will be prompted to restart Slicer, which you should do.
Once Slicer restarts, an additional menu entry LabKey is available
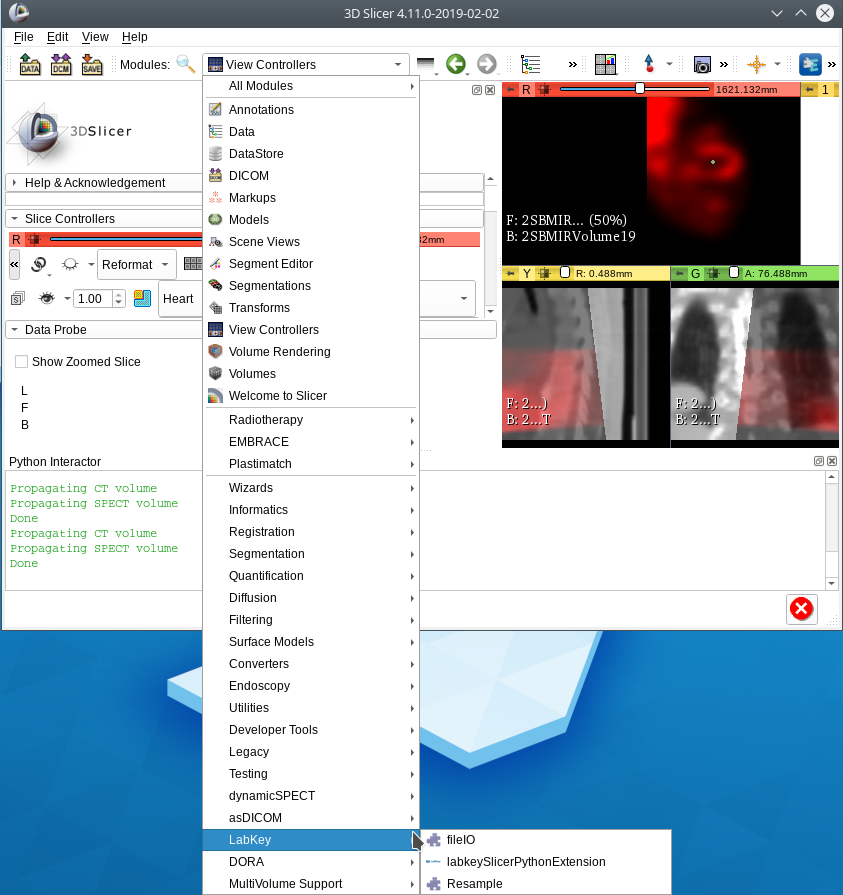
Select labKeySlicerPythonExtension from the LabKey menu. The areas of the module are indicated on the image.

Connection setup
Connection is composed of three parts - ssl/certificate setup, server url, labkey credentials. Those can be packed
in a file. The SSL part consists of exact locations of the certificate files - you'll need the .crt
certificate in PEM/DER format and the .key in RSA format, which are part of the package you'll get from the CA manager,
currently andrej.studen@ijs.si. The CA certificate can normally be found at merlin. The host and context part
refer to the server, which in general should include http(s) header. context is normally set to labkey unless you really know
what you are doing. The last part are the labkey credentials. Depending on those certain projects will be visible/available.
To change default settings, modify the dummy Remote.json created earlier using either VisualCode or Notepad
or similar tools for editing JSON files.
The default connection can be overloaded by identically organized file anywhere else that is loaded through the Load configuration button,
which is a link to a local file browser that lets you select an alternative configuration file.
The third way to configure connection mannualy through fields in the module. Buttons exist for selecting files containing personal certificate, CA certificate and key and text fields to put in the server, labkey username and key password which is distinct from the labkey password given separately.
If the server you are connecting to (onko-nix, labkey-public, UKC server) doesn't use SSL, SSL fields can be omitted from
configuration file (just change SSL tag to _SSL) and values in the form are ignored.
Remote file browser
This area lets you select a location at the remote server. Double-click selects a particular area or file. To begin with, a
double click on a single dot (.) will list the content of the core directory. After that, clicking on a folder will list the
content of that folder, clicking two dots (..) will navigate a level up and if a file or empty directory is clicked, only
single and double dots are available. To select a file, a double-click is required. I the area immediately below the browser,
the path of the selected file is shown.
File type selector
This feature is part of the Slicer's way of loading files. Each file that can be loaded is considered a node. There can be different type of nodes - most common are Volumes, Transformations and Segmentations. Once a particular file is to be loaded, Slicer requires the knowledge of its type. By selecting from a pull down menu, proper file type should be selected.
Cache management
By default, a mirror of the remote content layout is created under $HOME/labkeyCache directory. If the keep cached file
button is checked, the downloaded file is kept in the cache for later use.
IMPORTANT: if a local file is present, remote is ignored. If the remote file changed, the local one should be manually deleted.
If the box is not checked, local file is not kept.
Load file/directory
This button loads the content of the selected file to Slicer's memory, creating volumes, segmentations or transformations
if neccessary. Be aware that the file has to be selected, which can be verified by checking that the whole file name is
listed in the Selected file text box and that file browser only shows a single and a double dot. If the wrong file type
is selected, no data is loaded into Slicer, but depending on the check state of cache box, the file is downloaded to
labkeyCache area.
Tasks
Try to load MLEM.nrrd volume file from Tutorial project on labkeyLocal. If you don't have a user name on the server, ask
[]: "# Make a 2D plot" []: "#A nice example of a 2Dplot."